Monthly Archives: October 2014

Nikki’s Roasted Veggies

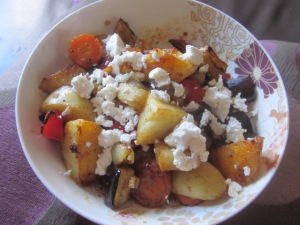
There’s not a lot better than the delicious fragrance of something roasting in the oven. This is a really simple lunch or dinner, that provides all the comfort of a roast dinner, while being light enough that I can eat it without feeling guilty not choosing a salad instead! The natural flavours of whatever vegetables you may choose are really amplified in the roasting process, and are accentuated by a light touch of spices and herbs. AND it even makes for a fairly healthy meal. I listed the ones I prefer to use, but almost whatever veggies you have will work perfectly. My recipe is for one (or two as a side dish), but as with any roast, it’s quite simple to add more of whatever you want. If you’re not a vegetarian and are looking to add some meat, chopped chorizo or chicken thighs would work well, although this dish is certainly not lacking without them!

IMG_4225

Ingredients:

  • One washed potato
  • One large carrot
  • 1/4  whole eggplant/aubergine
  • Half a brown onion
  • One garlic clove
  • Half a red capsicum
  • 1/4 head of broccoli
  • Two tablespoons smoked paprika
  • One tsp dried oregano
  • Three tablespoons olive oil
  • Salt and pepper
  • 50g salt-reduced feta (optional)

Method:

  1. Half an hour before starting to prep the rest of the veggies, chop the eggplant into two cm thick slices and place on paper towel. Heavily sprinkle salt on one side of the eggplant and leave for 15 minutes, until the eggplant has started to sweat. Pat the eggplant dry, turn the slices over and repeat on the other side of the eggplant. Wash the salt off, and it’s ready to use!
  2. Preheat the oven to 200 degrees Celsius. Wash and chop the veggies into medium-large chunks, and cut the garlic clove in half.
  3. Line a baking tray with baking paper and mix the oil, paprika, salt, pepper, and oregano in the bottom of the tray.
  4. Add the vegetables to the tray, and toss until they’re coated evenly in oil and spice.
  5. Place in the oven and reduce temperature to 180 degrees. Bake for one hour, stirring gently occasionally throughout the cooking time.
  6. After an hour, check that the vegetables are cooked to your liking, and allow to cool for ten minutes. Transfer to serving bowls/plates, and if using, sprinkle liberally with the feta. Enjoy!

No-bake Lemon Cheesecake

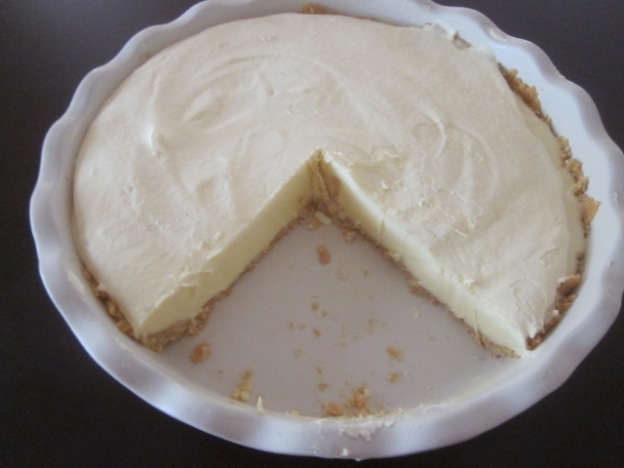
This is one of my favourite recipes when I’m looking for a lighter indulgence than something of the typical bread/cake/biscuit variety. There’s simply nothing tastier on a hot Spring day than a delectably light and creamy cheesecake with a lemony tang and a buttery cookie crust. Particularly since I love to smooth a large dollop of whipped cream on top! As with may recipes, the level of acidity and sweetness to this is to taste, so you may find that you need to adjust slightly depending on your personal tastes. If you are anything like me, you may wish to add a drop or two of yellow food colouring to amp up the sunshine cheerfulness of this dessert, however I did manage to stop myself this time as I made this especially for my Dad in celebration of his favourite rugby team winning the Grand Final for the first time since 1971! There is also no added gelatin, so this recipe is suitable for vegetarians.

IMG_4217

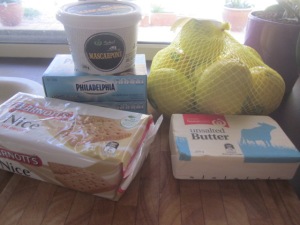
Ingredients:

IMG_4211

  • 500 grams cream cheese (low-fat or otherwise)
  • 250 grams mascarpone
  • 250 grams Nice biscuits (or whatever flavour you choose, but these are a family tradition)
  • 120 grams butter, melted
  • Juice of 1-2 lemons
  • 2 cups icing sugar, sifted
  • 150 ml pure/single cream (optional)

Method:

  1. Allow the cream cheese to sit at room temperature for about an hour – it should still be cold, but will be softened enough that it will be easy to work with.
  2. Blitz the biscuits in a food processor until they are reduced to fine crumbs, ensuring there are no clumps. Alternately, wrap the packet securely in a freezer bag and tea towel, and bash with a rolling pin or meat cleaver until the biscuits are obliterated into fine, sugary cookie dust.
  3. Mix in the melted butter a little at a time until the biscuit crumb is the consistency of wet sand, and you can form semi-compact little handfuls with it. Press it out into the base of your tin, forming a wall up the sides to encase the cheese filling. Ensure that the crumbs are pressed out evenly and thinly. Place in the fridge to firm up while you make the cream cheese filling.
  4. Break apart the blocks of cream cheese apart in a large bowl, add the mascarpone and mix until well combined and fluffy. Add one cup of the icing sugar and mix though. IMG_4214
  5. Add the juice of the first lemon and mix very well until it is well incorporated, and the mix is light and creamy. TASTE.
  6. I then added the rest of the icing sugar, and the juice of the lemon in two parts. As I mentioned above, this is very to taste, so you may need less lemon juice. or more icing sugar Do not use more than the juice of two lemons, however, or the mix will be too runny and will not set correctly.
  7. When your cream cheese filling is to the taste of your liking (and please attempt to refrain from tasting too much of it), smooth it in the pan over the top of your biscuit crust.
    IMG_4215
  8. If topping with cream, whip the cream until it forms stiff peaks and spread over the top of the cream cheese.
    IMG_4216
  9. Refrigerate for a minimum of two hours, preferrably overnight before cutting a slice and enjoying! This is a good match for berries, which are currently in season, but is utterly decadent on its own.

IMG_4220